You have discovered a water stain on the ceiling of your commercial building. Your first instinct is to go up on the roof and look for damage directly above the stain. Unfortunately, on a flat roof, that approach almost never works — and patching the wrong spot wastes time and money while the real leak continues saturating your insulation and damaging your building’s interior.
Finding the source of a leak on a flat or low-slope roof is one of the most challenging diagnostic tasks in the roofing industry. Water is a deceptive adversary on flat surfaces, and pinpointing its exact entry point requires experience, systematic methodology, and in many cases, specialized technology that costs $500–$1,500 but can save you $5,000–$20,000 in avoided interior damage.
Our team brings 40+ years of combined experience tracking down commercial roof leaks across Cherokee County, Dawsonville, Canton, and the surrounding North Georgia area. Here is why flat roof leaks are so difficult to find, and exactly how professionals solve the puzzle.
Why Flat Roof Leaks Are So Deceptive
On a steeply sloped residential roof, gravity is your ally. Water enters and flows downhill, so the interior leak is usually within a few feet of the roof damage. The diagnostic path is short and relatively straightforward.
On a flat roof, the rules change completely. Here is what actually happens when water breaches your roof membrane:
Step 1: Water enters through a tiny breach. A puncture as small as a pinhole, a failed seam that has opened just 1/16 of an inch, or a cracked flashing detail at a pipe penetration — any of these creates an entry point. The breach may be so small that it is invisible without close-up inspection.
Step 2: Water spreads laterally. Instead of dropping straight down, the water gets trapped between the roof membrane above and the insulation or substrate below. It then travels horizontally, following the slightest, imperceptible slope of the roof deck. A roof that looks “flat” to the naked eye actually has subtle undulations of 1/8 to 1/4 inch per foot — enough to direct water on a long horizontal journey.
Step 3: Water travels 20–50+ feet. The water continues spreading laterally until it finds an easy path downward. This could be a seam in the metal deck, a bolt hole where equipment is anchored, a gap around a light fixture, or a penetration in the vapor barrier. By the time it appears on your ceiling, the water may have traveled 20, 30, or even 50+ feet from the actual entry point.
Step 4: Interior damage appears. The stain on your ceiling marks where the water finally found its way through — not where it entered the roof. This is why patching the roof directly above the stain has a failure rate of over 90% for flat roof leaks.
Understanding this lateral travel pattern is critical. It explains why a building can have a single, small roof puncture and develop multiple interior leaks in different rooms — the water spreads in all directions from the entry point and finds several separate paths downward.
Professional Leak Detection Method 1: Systematic Visual Inspection
Before deploying any technology, an experienced commercial roofing technician performs a detailed hands-and-knees visual inspection of the entire roof surface. This is not a casual walk-around — it is a systematic, section-by-section examination that typically takes 2–4 hours for a standard commercial roof.
Priority inspection areas (in order of likelihood):
- Seams. Using a blunt seam probe, the technician tests every inch of accessible seam by applying gentle pressure to check for adhesion failure. Seams account for approximately 60% of all flat roof leaks. On EPDM roofs, adhesive seams can separate after 10–15 years. On TPO and PVC roofs, weak heat welds create failure points.
- Flashing and penetrations. Every pipe boot, HVAC curb, parapet wall termination, and skylight frame is inspected for sealant failure, membrane separation, or physical damage. These detail areas endure the most thermal movement and are the second most common leak source at roughly 25% of all leaks.
- Drains and scuppers. Drain seals are checked for integrity, and the membrane immediately surrounding each drain is inspected for cracks or separation. Clogged drains also get cleared — blocked drainage leads to ponding that accelerates all other failure modes.
- Field membrane. The open areas between seams and details are inspected for punctures, blisters, cracks, and signs of advanced weathering. Our technicians look for subtle clues: a small rust stain (indicating a fastener backing out), a tiny circular mark (screw puncture), or a linear impression (tool or equipment damage).
A thorough visual inspection identifies the leak source in roughly 50–60% of cases. When it does not, we move to technology-based methods.
Professional Leak Detection Method 2: Electronic Moisture Mapping
When a visual inspection cannot pinpoint the source — or when we need to understand the full extent of moisture infiltration — electronic moisture detection tools add a critical layer of diagnostic accuracy.
Moisture meters. Handheld devices (either pin-type or capacitance-based) detect moisture content within the roofing substrate without cutting into the membrane. By taking readings on a 5–10 foot grid across the entire roof, technicians can create a moisture map that shows the concentration pattern. The wettest area typically sits closest to the original entry point, with moisture levels decreasing as you move outward along the travel path.
Cost: Moisture meter testing adds $200–$400 to a standard inspection, depending on roof size.
What it reveals: A moisture map does not show the exact puncture or seam failure — it shows where water has accumulated beneath the membrane. Combined with the visual inspection findings and knowledge of seam locations, this data usually narrows the source to a 5–10 foot area that can be closely examined and repaired.
Professional Leak Detection Method 3: Infrared (IR) Thermography
For the most stubborn and widespread leaks — or when a building owner needs a complete picture of their roof’s moisture condition — infrared thermography is the most powerful diagnostic tool available. It can map the moisture profile of an entire roof in 1–2 hours with remarkable accuracy.
How infrared scanning works:
During the day, the sun heats the entire roof surface. After sunset, the roof begins to cool through radiation. Here is the critical physics: dry insulation cools quickly because it has relatively low thermal mass. Wet insulation retains heat much longer because water has very high thermal mass (specific heat capacity).
An inspector using a professional infrared camera scans the roof surface during this cooling period — typically 1–3 hours after sunset on a clear evening following a warm day. On the camera display, wet areas glow brightly (they are warmer) against the cooler, dry background. The result is a clear thermal “map” of every area where moisture has infiltrated the insulation.
What makes IR scanning so valuable:
- Comprehensive coverage. A single evening scan covers the entire roof, identifying moisture in areas you would never think to check.
- Non-destructive. No cutting, no probing, no damage to the existing membrane.
- Quantifiable results. The thermal map shows exactly how much of your roof’s insulation is wet, expressed as a percentage of total area. This data is critical for deciding between coating restoration and full replacement.
- Documentation. The thermal images become part of your building’s roof record, useful for insurance claims, warranty discussions, and tracking changes over time.
Cost: Professional IR scanning runs $500–$1,500 for a typical commercial roof, depending on size and complexity.
Best conditions: Clear evening, light winds, after a warm sunny day (minimum 20°F temperature differential between daytime high and scanning time). In North Georgia, the optimal scanning season is April through October.
Professional Leak Detection Method 4: Core Sampling
When infrared scanning identifies wet areas, or when we need definitive confirmation of insulation condition, core sampling provides physical proof. A technician cuts a small test plug — typically 2 inches square — through the membrane and insulation at strategic locations identified by the IR scan or moisture meter readings.
What core samples reveal:
- Moisture content. The insulation is physically examined and weighed to determine how much water it has absorbed. Dry polyiso insulation weighs roughly 1.5 lbs per cubic foot. Saturated insulation can weigh 5–8 lbs per cubic foot — an unmistakable difference.
- Insulation condition. Beyond moisture, core samples show whether the insulation has maintained its structural integrity or has deteriorated to a spongy, compressed state that has lost its R-value.
- Deck condition. Looking through the core hole, the technician can visually inspect the roof deck for rust (metal deck), rot (wood deck), or deterioration.
Cost: Core sampling adds $200–$500 to the diagnostic process, depending on the number of samples needed.
Each core hole is carefully patched after inspection using the same membrane material and bonding technique as a puncture repair, restoring the waterproof integrity of the roof surface.
The Cost of Ignoring a Flat Roof Leak
Building owners sometimes delay leak investigation because the interior stain seems small or the drip seems manageable. Here is why that calculation is almost always wrong:
- A $300–$1,500 professional repair today prevents $5,000–$20,000 in interior damage (ceiling replacement, insulation replacement, electrical repair, inventory loss, mold remediation)
- Every day a leak goes unrepaired, more insulation gets saturated — increasing the eventual repair cost
- Wet insulation loses 40–70% of its R-value, driving up energy costs by 10–20% in affected areas
- Chronic moisture creates conditions for mold growth, which adds health liability and remediation costs of $2,000–$10,000
- Water reaching electrical systems creates fire and safety hazards that can result in code violations
The math is clear: early detection and targeted repair is always less expensive than letting a leak run its course.
When to Call a Professional
Do not attempt to diagnose a flat roof leak by guessing. If you see any of these signs, call for professional leak detection:
- Water stains, drips, or damp spots on interior ceilings or walls
- Musty or moldy odors in rooms below the roof line
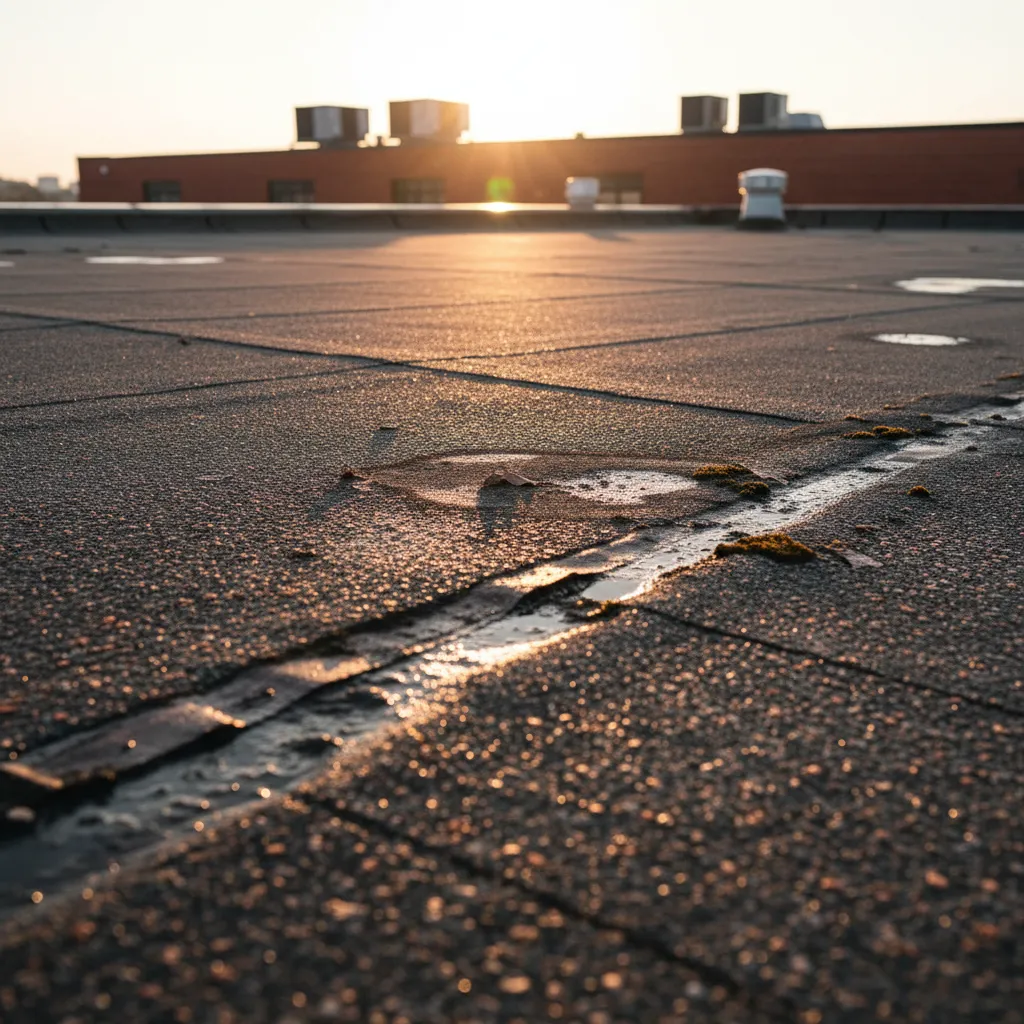
- Standing water on the roof more than 48 hours after rain (ponding accelerates leaks — learn more about the three enemies of your flat roof)
- Unexplained increases in heating or cooling costs (may indicate wet insulation)
- Visible membrane damage, open seams, or deteriorated flashing during any rooftop visit
Our team uses all four detection methods — visual inspection, moisture meters, infrared thermography, and core sampling — to provide accurate diagnosis and targeted repair for commercial buildings across Cherokee County, Dawsonville, Canton, and the greater North Georgia area. We find the real source of your leak, not just the spot where water happens to appear inside.
Dealing with a mysterious flat roof leak? Contact us for professional leak detection or get an instant estimate for flat roof repair.
Related reading: Punctures, Seams, and Ponding Water: The 3 Enemies of Your Flat Roof | The Importance of a Commercial Roof Maintenance Plan